
- SureCookie Installation Guide
- Installing SureCookie Pro
- Updating SureCookie
- How to Set Up SureCookie: Onboarding Wizard Guide
- SureCookie Dashboard Overview
- Connecting Your Site to SureCookie (Scanner Setup)
- Using SureCookie on Multiple Sites
- Uninstalling SureCookie & Data Cleanup
- Preferences Settings (Menu, Branding, Analytics)
- Re-Consent
- Understanding SureCookie Logs
- How to Set Up Geographic Targeting
- Resource Blocking
- Setting Up Google Consent Mode v2
- Consent Models Explained (Opt-in vs Opt-out)
- Exporting Consent Logs (PDF Proof + CSV)
- Consent & Data Settings (Duration, Retention, Renew)
- Consent Forwarding Across a Multisite Network
- Resource / Script Blocking (Add Embeds + Fixes)
Uninstalling SureCookie & Data Cleanup
Removing SureCookie is safe and reversible by default: your settings, consent logs, and scan results stay in your database unless you explicitly choose otherwise. The one decision to make before you uninstall is whether that data should be preserved or permanently deleted, controlled by a single setting.
This article walks through that decision, the difference between deactivating and uninstalling, and what to expect afterward.
Before You Uninstall
- Export any consent records you need. Consent logs are your proof of consent. If you have retention obligations, download them first. See Exporting Consent Logs (PDF Proof + CSV).
- Know the compliance gap. Once SureCookie is deactivated, there’s no banner, no script blocking, and no consent logging. Any trackers on your site will run freely, so have a replacement plan if you still need consent management.
Step 1: Decide What Happens to Your Data
The Delete Data on Uninstall setting controls the cleanup. Find it under SureCookie → Settings → General → Consent & Data.
- Off (the default) – Uninstalling removes the plugin but preserves all data: settings, consent logs, scan results, and your scanner connection. Reinstall later and you pick up where you left off.
- On – Uninstalling permanently deletes all plugin data, including consent logs, settings, and scan results. This cannot be undone.
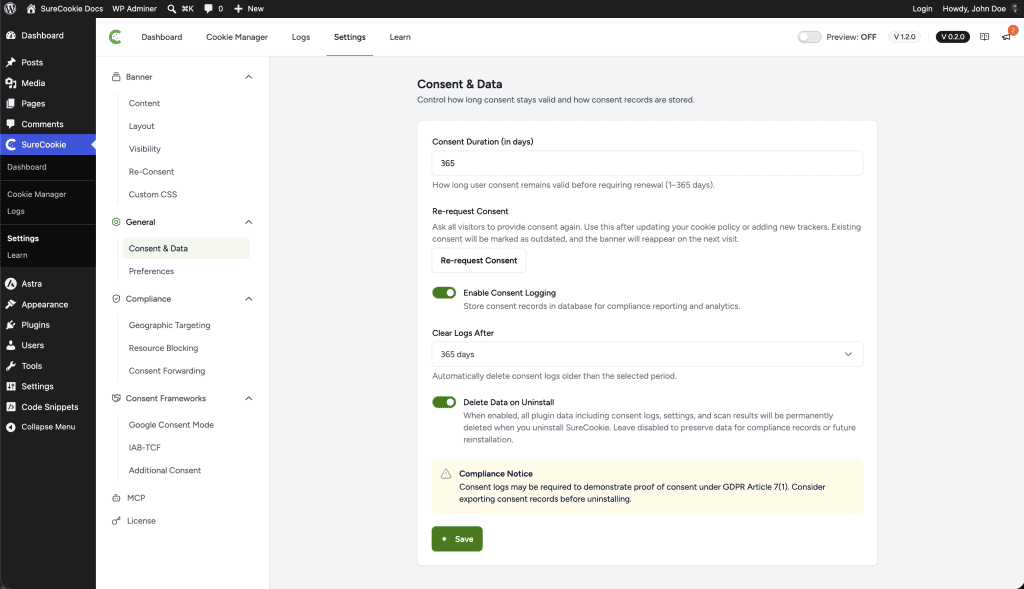
Important: Turning this on makes uninstalling irreversible for your consent records. Leave it off unless you’re certain you won’t need the data, and export your logs first either way.
Step 2: Deactivate or Uninstall?
- Deactivate pauses the plugin. The banner, blocking, and logging stop, and SureCookie’s scheduled tasks (log cleanup and scan schedules) are cleared, but nothing is deleted. Reactivate anytime and everything resumes.
- Uninstall (Delete) removes the plugin’s files, and runs the data cleanup according to the setting above.
If you’re troubleshooting or switching temporarily, deactivate. Only uninstall when you’re done with the plugin.
Step 3: Remove the Plugin
- Go to Plugins → Installed Plugins.
- If you use SureCookie Pro, deactivate and delete it first. Pro runs on top of the free plugin.
- Deactivate SureCookie, then click Delete.
What’s Removed vs. Kept
| Data | Delete Data off (default) | Delete Data on |
|---|---|---|
| Settings and banner configuration | Kept | Deleted |
| Consent logs | Kept | Deleted |
| Scan results and detected cookies | Kept | Deleted |
| Scanner connection credentials | Kept | Deleted |
One thing no uninstall touches: the consent cookie in your past visitors’ browsers. It’s a harmless first-party cookie that simply expires on its own.
Reinstalling Later
- If your data was preserved, reinstalling restores your configuration, cookie list, and logs, and your scanner connection still works.
- If your data was deleted, SureCookie starts fresh: run onboarding, reconnect your site, and scan again. If reconnecting the same domain fails, contact support to reset the domain’s registration. See Connecting Your Site to SureCookie (Scanner Setup).
Troubleshooting
- You want your data gone, but already uninstalled with the setting off – Reinstall SureCookie, turn Delete Data on Uninstall on, save, and uninstall again. The cleanup runs on that uninstall.
- Old settings reappeared after reinstalling – That’s the default preservation working as intended. To start clean instead, use the step above.
- The banner is still showing after deactivating – A cached page is being served. Clear your page cache and CDN.
We don't respond to the article feedback, we use it to improve our support content.